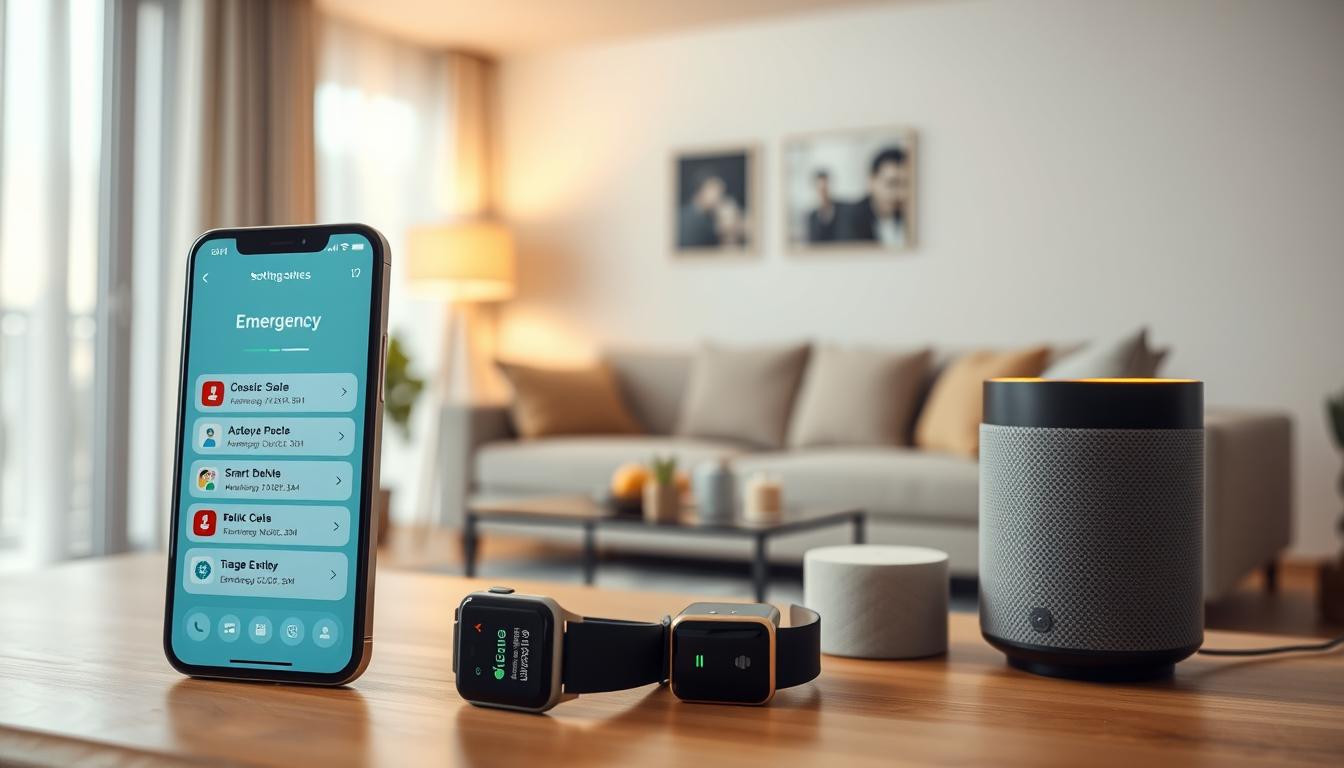
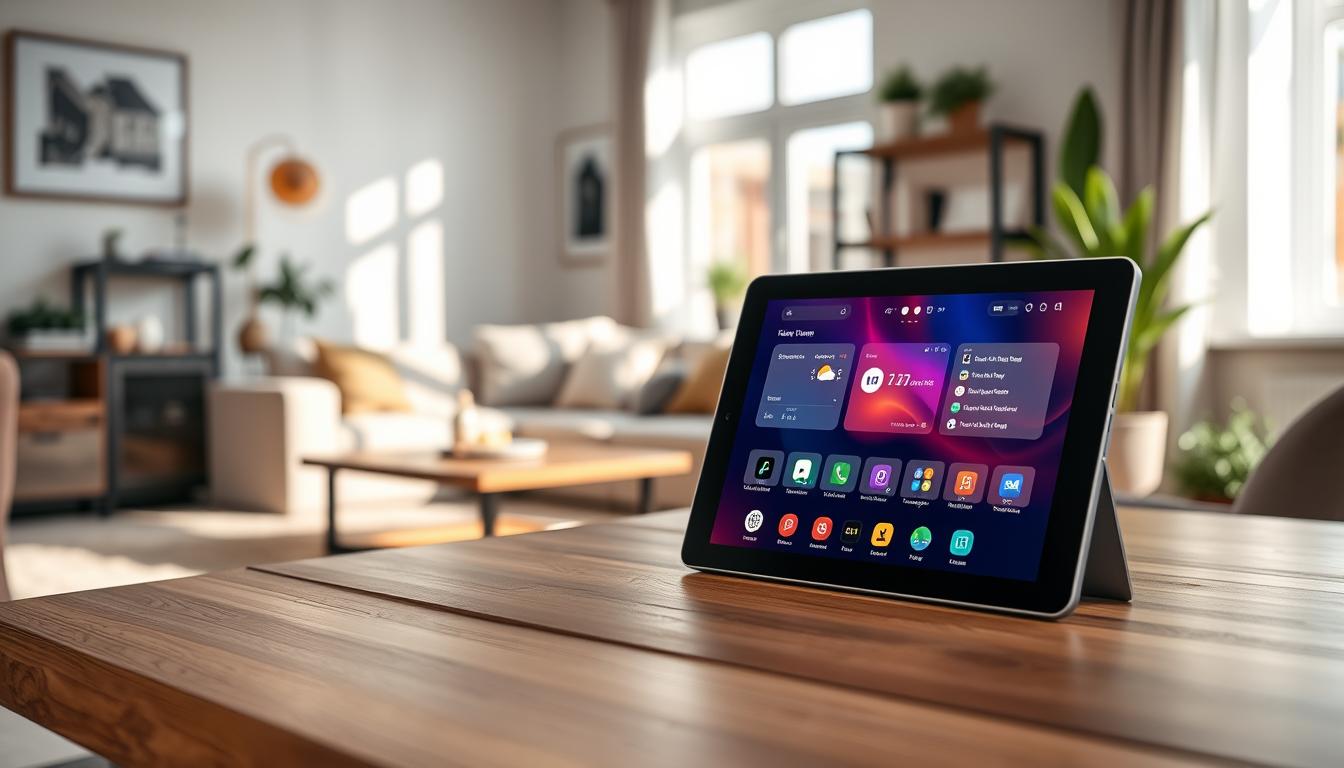
You’ll learn to make a tablet a reliable home control hub. It will show lights, cameras, temperature, energy info, and your calendar easily.
The guide helps pick affordable models like Amazon Fire HD or an iPad. You’ll install a fullscreen dashboard or companion app. Then, lock the device in kiosk mode for home tasks only.
Steps include managing power and battery health. You’ll add motion or proximity wake and embed camera feeds. You’ll also create room-based views tied into Home Assistant or other dashboard software.
By the end, you’ll have a smart home tablet as a central touch surface. It will reduce phone taps and work well with voice assistants.
Understanding the Importance of a Home Control Tablet

A dedicated tablet turns your wall or counter into a reliable smart home controller. You can see it at a glance. No more hunting through phone apps or relying only on voice assistants like Google Assistant or Alexa for tasks that need visual feedback.
The visual overview shows temperature, who’s home, alarm status, camera feeds, energy charts, and calendar reminders in one place. This single-pane view helps you spot issues fast and act without opening multiple apps.
Tactile control improves daily use. Large buttons, swipes between rooms, and direct access to scenes make routines faster. A touchscreen control device reduces friction compared with locked-down smart displays or juggling a phone.
Many Home Assistant users convert spare Android tablets into kiosks with Fully Kiosk Browser. They add motion wake, lockdown, and sensor integration. Community dashboards like HADashboard or custom AdminLTE and Vue panels create lightweight, material-design interfaces that run well on low-power tablets.
- Better integration: a connected home tablet can link to devices that voice platforms won’t support.
- Full customization: you control layout, theme, and which automations are front and center.
- Tradeoffs: a DIY touchscreen control device needs setup—mounting, power routing, and a kiosk app—but gives broader compatibility than Nest Hub or Echo Show.
Think of the tablet as a central hub that complements your smart speakers and phone apps. It gives you a flexible visual control surface for the systems you rely on every day.
Choosing the Right Tablet for Home Control

Choose a size that fits your wall and how you use your home control hub. Look for an 8–10.5 inch screen. Many people prefer a 10″ tablet for easy reading from a distance.
Think about if you need the screen to stay on all the time. Amazon Fire tablets have Show Mode on newer models. Apple iPad uses Guided Access to lock the screen. Android tablets might need kiosk apps like Fully Kiosk Browser or WallPanel to wake up when you move.
- Amazon Fire HD 10 / HD 8 — great value for DIY dashboards. Show Mode is built-in on newer Fire HD devices, making it a top choice for a smart home tablet.
- Samsung Galaxy Tab A8 / Lenovo Tab M10 — good budget Android tablets. You might need extra apps for kiosk features and to wake up on motion.
- Apple iPad (9th gen) — high-end display and smooth performance. Guided Access makes it easy to lock the screen. It’s more expensive but offers a polished experience.
Be aware of performance limits on cheaper tablets. Tablets with 1 GB of RAM might struggle with the default Home Assistant Web UI. Use lightweight dashboards or tile-based UIs to make it run smoother.
Think about how you’ll expand and mount your tablet. Decide if it will run a local web server or display dashboards from Home Assistant. Choose models with good viewing angles and steady Wi‑Fi for a reliable home control hub.
Plan for constant power and a clean setup. Use flat USB cables or in-wall USB power for a neat look. Make sure the tablet can charge continuously without overheating or waking up too often.
Find a balance between cost, looks, and function. Your smart home tablet should look good on the wall, respond quickly, and be reliable as your home control hub.
Setting Up Your Tablet for Home Control
First, prepare your tablet’s software to make it a reliable home automation tool. For Android, Fully Kiosk Browser is a top choice for kiosk mode. WallPanel is a free option. On iPad, use the Home Assistant app and Guided Access to lock it to your dashboard.
For Home Assistant users, create a Lovelace dashboard or choose HADashboard or Tileboard for tile layouts. Many host a local web server on the tablet. This keeps it fast and self-contained.
Set up kiosk features to keep the device secure and focused. Lock it to the dashboard, set up remote admin, and enable motion wake. Plan screensavers and brightness for day and night.
- Enable Fully Kiosk integration with Home Assistant for screen control and camera feeds.
- Use motion wake with camera detection or sensors to save power and add convenience.
- Set a screensaver timeout and brightness limits to extend the tablet’s life.
Mounting and power choices affect reliability. Use 3D-printed frames, VidaMount, or TabDock mounts. Flush wall mounts hide cables. Community builders suggest VidaMount or a flat USB for a clean look.
Plan for permanent power to avoid interruptions. Run in-wall USB power or use a cable channel. Set charge limits with apps like AccuBattery or smart plug timers to cap charging at 80% for better battery health.
- Place the tablet at 140–150 cm (eye level) for comfortable viewing and touch control.
- Keep the tablet near an outlet or make an in-wall USB install during mounting.
- Consider a lockable mount if the device is in a public or busy area of the home.
Design an initial dashboard layout that meets your daily needs. Create views like Main for temperature and quick lights, Security for cameras and alarm status, Energy for consumption charts, and Media for music and TV controls. Follow Home Assistant’s dashboard workflow to link cards and actions cleanly.
Test remote admin and wake features before final installation. Confirm the tablet responds to your home control hub, wakes reliably on motion, and screens and cameras display correctly. Small tweaks now save time after mounting.
Designing a User-Friendly Interface
Start with a dark theme and high-contrast accents to cut glare and save energy on OLED panels. Use very dark backgrounds like #1a1a2e or #0f0f23 and bright accent colors for status and action highlights. This palette makes icons and text pop on a smart home tablet mounted on a wall.
Make controls large and easy to tap. Aim for buttons at least 60×60 px and fonts 18 px or larger. Give each element generous spacing to prevent mistaps when you use a touchscreen control device from across the room.
Organize the dashboard so each view equals one room or category. The main page should show quick highlights: temperature, occupancy, and alarm state. Add clear quick-action buttons for common tasks like turning lights on, arming security, or adjusting blinds on your smart home controller.
- Use card-based layouts such as Mushroom Cards for clean, functional widgets in Home Assistant.
- Embed cameras with Picture Glance or iframe for RTSP feeds via Frigate or go2rtc to show live video thumbnails.
- Create a floor plan with the picture-elements card so interactive icons control lights or open detailed room views when tapped.
Keep the home screen minimal. Include only essential quick controls and status items so the interface stays readable at a glance. Avoid copying a phone UI; design for a fixed, wall-mounted smart home tablet experience instead.
Use motion-activated wake and dimming to balance convenience and power savings. Set Fully Kiosk to 80% brightness by day and 30–40% at night. Show a screensaver with a clock or family photos when idle to reduce burn-in and keep the device useful.
Provide clear fail-safes to prevent accidental exits. Enable a PIN-protected exit or Guided Access so household members cannot leave the dashboard by mistake. This protects both usability and security for a touchscreen control device used by visitors or children.
- Prioritize the most-used controls on the main view.
- Group secondary items under room-specific pages.
- Test tap targets and spacing at the intended mounting distance.
Look at community patterns for ideas. Builders often use AdminLTE-based custom UIs, Vue.js components, or HADashboard for large, readable widgets on Fire tablets. Adapt these examples to your smart home controller and to how your household interacts with a smart home tablet.
Integrating Smart Home Devices
First, pick a platform that matches your setup. Home Assistant supports thousands of devices and works great on a smart home tablet.
Use Home Assistant Lovelace to make cards for lights, climate, locks, sensors, and scenes. Place important controls on your tablet’s main view for easy access by family members.
For large widgets and a display for wall-mounted tablets, consider HADashboard (AppDaemon). Its YAML setup ensures a neat layout and quick loading on cheap tablets.
Tileboard is good if you like custom HTML/CSS for perfect visuals. It offers tile-based control that looks great on a tablet and makes tweaking easy.
- Embed camera feeds via RTSP or HLS using Frigate or go2rtc integrations.
- Use Picture Glance or iframe cards to show video, and trigger fullscreen on doorbell events.
- Add Sonos, Chromecast, or local media players so you control music from the home control hub display.
Turn tablet sensors or Fully Kiosk motion detection into occupancy triggers. Use these triggers to run automations, like turning on hall lights or showing presence on the main dashboard.
Centralize devices from Philips Hue, Zigbee, Z-Wave, Nest, Amazon Alexa, Sonos, Leviton, and Eve with Home Assistant. Having them all on one dashboard on a smart home tablet fixes the problem of different systems.
Tap into the community for more cards and layouts. HACS hosts custom components and GitHub projects, including Vue.js or AdminLTE templates. These can make your Fire tablet and other devices look and work better.
Creating Automation Routines
Begin by setting up simple triggers for daily activities. For example, motion sensors can wake your tablet when someone enters a room. Pressing the doorbell can bring up a full-screen camera feed on your home control hub.
For predictable changes, use scheduled routines. A timer can dim lights, lower the thermostat, and change the dashboard theme at night. The sunset and sunrise can trigger lighting and shading scenes.
Link presence to context. When family members arrive, your main dashboard can show who’s home. It can also offer quick actions like welcome scenes or music controls. This makes your smart home controller feel more personal.
- Implement triggers in Home Assistant using the Automations UI or YAML.
- Map actions to the tablet: turn the screen on, navigate to a dashboard, show a popup, or run scenes.
- Use Fully Kiosk integration to control tablet functions remotely from Home Assistant.
Use the tablet as a sensor and controller. Connect its motion or camera to room presence sensors. This controls lights and HVAC without extra hardware, improving your home control hub’s awareness.
Create shortcuts on dashboard pages for quick actions. A single “Good Night” button can arm the alarm, turn off lights, lock doors, and set the thermostat. This simplifies controlling your smart home in one tap.
- Start with two or three automations: motion wake, doorbell popup, and a simple night routine.
- Test each rule and log behavior for a few days to catch false triggers.
- Iterate based on household feedback and gradually add complexity.
Keep automations simple and easy to read in Home Assistant. Use clear names and comments in YAML. This makes troubleshooting easier and lets others understand your home automation tablet.
By starting small and using the tablet as both control surface and sensor, you create a reliable system. Your smart home controller becomes an intuitive hub that adapts to your daily life.
Optimizing Performance and Security
Use lightweight dashboards or apps like HADashboard or Tileboard to keep your tablet fast. Heavy web UIs can slow down low-RAM devices. Break interfaces into smaller views and limit cards per page to speed up rendering.
Modular code makes your system faster and easier to maintain. Use tools like webpack or Vue.js to break code into components. This approach leads to cleaner code and fewer glitches on your smart home tablet.
Optimize camera feeds and images for a smooth interface. Use static thumbnails or low-bandwidth streams for multiple feeds. This reduces CPU load and saves battery, making your device more efficient.
Ensure your tablet stays powered for a permanent wall mount. Use an in-wall USB or flat cable to hide wiring. Set charging limits with apps like AccuBattery or kiosk features in Fully Kiosk to prevent overcharging.
For devices without built-in charge limiting, use a smart plug or timed charging. This helps prevent constant topping that shortens battery life.
Lock the interface to prevent tampering. Use kiosk mode with a PIN exit or Guided Access on iPadOS. Secure Home Assistant with SSL, strong passwords, and two-factor authentication for remote access.
Keep your OS and kiosk apps updated. Avoid sideloading untrusted APKs to prevent vulnerabilities. Regular updates reduce exposure and patch known risks.
- Use Fully Kiosk or similar tools for remote management and status checks.
- Place simple health cards on the dashboard for Wi‑Fi strength, last reboot, and battery state.
- Log events to Home Assistant so you can spot trends before they become failures.
Prefer community projects with modular, maintainable practices. Watch GitHub repositories for updates and contribute fixes when you can. Cleaner code bases lead to more reliable smart home controllers and a smoother experience.
Using Voice Commands with Your Tablet
Voice makes daily control faster. On a smart home tablet, you can say a quick command. This turns lights on, plays music, or sets the thermostat without touching the screen.
First, choose how you want voice handled. Home Assistant Assist lets you process voice locally for privacy. Amazon Alexa or Google Assistant work through their apps for cloud voice services.
Set up the companion app on Android or iPad and grant microphone permission. Map voice intents to automations. This way, a phrase triggers the exact action you expect from your smart home controller.
- Use a microphone-equipped tablet and kiosk mode to run a single dashboard app while keeping voice active.
- Consider Fully Kiosk for motion triggers and media control, then forward events to Home Assistant for unified control.
- If privacy matters, favor local processing with Home Assistant Assist or local voice add-ons over cloud assistants.
Use voice for short tasks and touch for detailed adjustments. Say “play jazz” or “set living room to 72” for voice commands. Use the dashboard when you need to choose scenes or review camera feeds.
Design clear on-screen cues. Show a microphone icon that changes when listening. Display fallback instructions if voice fails. This reduces user confusion and keeps your smart home tablet reliable.
Accept limits. Some integrations do not translate cleanly to voice. Provide visible controls on the dashboard. This way, you never rely solely on spoken commands from your voice activated home control setup.
Troubleshooting Common Issues
If your tablet for home control won’t load the dashboard, start with the network. Check Wi‑Fi strength, IP assignment, and consider a dedicated SSID or a wired bridge for a stable connection to your home control hub. For camera problems, verify RTSP/HLS stream health in Frigate or go2rtc and confirm Home Assistant has the correct stream credentials.
When the UI is slow on a budget smart home tablet, reduce active cards and disable heavy JavaScript widgets. Switch to lighter dashboards like HADashboard or TileBoard if needed. Clear the browser cache in kiosk apps or restart the device to free memory; many 1 GB tablets struggle with modern web UIs out of the box.
If kiosk apps misbehave, review app permissions and license status. For Fully Kiosk, check camera and background activity permissions and motion detection licensing. On iPad, adjust Guided Access settings or reconfigure the guided session so necessary controls remain available.
Address mounting, power, and security issues proactively. Swap low‑quality USB cables, confirm in‑wall runs, and use better power adapters to stop intermittent reboots. Add ventilation to prevent overheating and reduce high‑refresh widgets or multiple camera streams. For remote access failures, verify SSL certificates, router NAT/port forwarding, or use Home Assistant Cloud. If community code is involved, follow the project README and open Issues; maintainers often note known bugs and recommended forks. As a last resort, reboot the smart home tablet and kiosk app, then perform a factory reset only after backing up configuration and reapplying kiosk and connected home tablet settings.